People throw around the words overbore and overpressure like they mean the same thing. They do not.
Meaning #1 (cartridge design talk) – a cartridge that has a lot of case capacity for a given bore size, often chasing velocity. Think “big boiler room, relatively small hole.” Those cartridges can run hot, burn barrels faster, and be less forgiving if you push them hard.
Meaning #2 (what matters at the loading bench) – an overpressure condition . That is when your exact combination of components and rifle variables produces more pressure than is safe or reasonable, even if the charge weight looks “normal” on paper.
In this article, we are talking about overpressure – pressure higher than your rifle, brass, and component set can handle safely. We use overbore only when discussing cartridge design.
This is not load data. This is a protocol. A serious way to keep your rifle, your face, and your fingers where they belong.
What “Overpressure” Really Is
Overpressure is not a single mistake like “too much powder.” It is the result of a chain. Pressure is driven by the amount of gas produced, how fast it is produced, and how quickly the system can relieve it by pushing the bullet down the bore.
If anything in the chain reduces usable case volume, increases initial resistance (bullet start pressure), or increases burn intensity, pressure climbs. Sometimes it climbs gradually. Sometimes it jumps. That jump is what surprises people.
Here is the truth most guys learn the hard way – a published “max” is not a promise. It is a result from a specific test setup. Your rifle is not the test barrel. Your brass is not their brass. Your throat, chamber, and freebore are not their throat, chamber, and freebore.
That is why disciplined reloaders treat everything as a controlled experiment. Same process, same checks, same notes, every time.
Why Overpressure Happens When You Think You Did Everything Right
Most “mystery pressure” comes from stacking variables. Each one alone might be harmless. Together, they can push your load past the line.
These are the big ones that matter in the real world:
1) Case capacity differences
Brass is not just a container – it is part of the pressure equation. Different brands, different lots, and even different numbers of firings can change internal volume. Less volume means the same powder charge has less room. Less room means higher pressure.
This is one reason experienced loaders do not casually switch brass and “keep the load the same.” When you change brass, you treat it like a component change and you back off.
2) Seating depth and bullet jump
Seating depth affects pressure in two ways.
First, seating deeper reduces usable case volume. That can raise pressure quickly, especially in cartridges already running near the top.
Second, seating into the lands (or closer than you think) increases initial resistance. The bullet has to engrave immediately. That raises start pressure, which can raise peak pressure. Some rifles tolerate it. Some do not. If you do not know exactly where your lands are and how consistent your seating is, “touching” can turn into “jamming” without you realizing it.
3) Throat and chamber reality
Not all chambers are the same. Factory chambers can be generous, tight, long, short, smooth, rough. Custom chambers can be cut for specific bullets. A shorter throat or less freebore can raise pressure with the same load. A tight neck or tight bore can do it too.
This is why “my buddy runs it fine” is worthless. His rifle is not your rifle.
4) Powder lot variation and temperature behavior
Powder is consistent, but it is not magic. Lot-to-lot burn characteristics can vary enough to matter near the top end. Temperature can also matter a lot, especially when ammo sits in the sun, in a hot truck, or in a hot chamber during load testing.
A load that is fine at 55 F can show pressure at 95 F, especially if you combine it with a hot chamber and rounds that were sitting in direct sun. If you want a hunting load that works in real conditions, you test in real conditions, or you leave a safety margin like a grown man.
5) Primer choice and ignition intensity
Primers are not all identical. Switching primers can change ignition and pressure. Sometimes it is subtle. Sometimes it is not. The safe rule is simple – any primer change means you back off and work back up.
6) Neck tension, crimp, and bullet release
Pressure is sensitive to how easily the bullet starts moving. If you have very heavy neck tension, inconsistent neck tension, or a crimp that is stronger than you think, you can increase start pressure. If you add that on top of minimal bullet jump, you can create a pressure spike that does not show up in “book” assumptions.
Consistency matters. The goal is not “tight.” The goal is “repeatable.”
Pressure Signs – What to Look For, and What They Actually Mean
Reloaders love to argue about pressure signs. Here is the clean way to think about it.
There are early indicators, strong indicators, and stop-now indicators. One sign by itself can lie. A pattern across multiple signs tells the truth.
| Sign | What it can mean | How seriously to take it |
|---|---|---|
| Sticky bolt lift / hard extraction | Pressure may be high, case may be sticking, chamber may be rough, or brass may be soft | High – if it appears suddenly during a workup, stop and back off |
| Ejector mark (bright swipe on case head) | Case head is flowing under pressure into ejector hole area | Very high – treat as near-limit or over-limit in most rifles |
| Extractor mark | High pressure or extraction timing, sometimes combined with a tight chamber | High – especially if new and paired with sticky lift |
| Flattened primers | Can be pressure, but can also be primer cup design, firing pin hole, or headspace factors | Medium – watch for sudden change, not “flatness” alone |
| Cratered primers | Can be pressure, but can also be large firing pin hole or soft primer cup | Medium – interpret with other signs |
| Pierced primers / blown primers | Often high pressure, excessive firing pin protrusion, or a weak primer cup | Stop-now – investigate before firing more |
| Loose primer pockets after firing | Case head has expanded, brass is done, pressure likely too high | Stop-now – scrap brass and back off load |
| Case head expansion growth | Pressure trend indicator if measured consistently | High – if you know how to measure and compare correctly |
The big one I trust in real life is bolt lift and extraction, especially when it changes abruptly during a workup. If your rifle suddenly needs more effort to open, do not negotiate with it. Pressure is telling you something.
Primer appearance is useful, but it is not a stand-alone gauge. Primer cup hardness, firing pin hole size, headspace, and primer brand can change how a primer looks. Compare changes in your rifle with the same primer, and treat sudden changes as a warning sign – not proof that you can push harder.
The rule that saves people
If you see a new pressure sign during workup, you do not fire “two more to confirm.” You stop, inspect, and back off. A reloading bench is not a casino. You do not “double down.”
Case Head Expansion – The Objective Measurement
Visual signs are subjective. Case head expansion is not.
When pressure rises, the case head expands. You can measure this with a quality micrometer at a consistent point just above the extractor groove. The key is consistency – same spot, same tool, same technique.
Here is how to use it:
- Measure new, unfired brass at the case head. Record the number.
- Fire a known safe load. Measure again. Record the expansion.
- As you work up, measure each step. Watch for the trend.
When expansion starts climbing faster than the charge weight increase, you are approaching the limit. When expansion exceeds 0.0005″ to 0.001″ beyond your baseline safe load, you are at or past the edge for most cartridges.
This method does not replace visual inspection. It adds objectivity to it.
Heat Management – The Most Ignored Part of Load Development
Heat turns “safe on paper” into “not safe today.” It does it quietly.
There are three heat sources that matter:
1) Ambient heat – the air temperature around you.
2) Ammo heat – cartridges warmed by the sun, your pocket, a hot vehicle, or sitting on a bench.
3) Chamber heat – a hot chamber warms the round as it sits, and that can raise pressure fast.
A serious workup protocol controls heat. That means:
- Keep ammo in the shade, or in a small cooler (no ice water contact, no condensation on cartridges).
- Do not leave a round chambered while you talk, spot, or adjust gear.
- Give the rifle time to cool between strings, especially with fast, overbore-style cartridges.
- If the barrel is too hot to comfortably hold near the chamber area, you are no longer running a controlled test.
Heat is also why you should not chase the last 50 fps. When you load at the edge, you have no margin. The day is hotter, the chamber is warmer, and suddenly you are in the red.
The Serious Load Workup Protocol
This is the disciplined method. It is not “fun.” It is not “fast.” It is how you stay out of trouble.
Step 1 – Pick real published data
Use data from the powder manufacturer and bullet manufacturer when possible. Use multiple sources if you can. If two sources disagree, you do not split the difference. You start low and work up like normal.
Do not build a load around a screenshot, a forum post, or “a guy at the range.” Those people are not responsible for your rifle.
Step 2 – Lock down your components
During development, you want consistency. That means:
- Same brass brand and lot (or at least same brand and similar history)
- Same primer type and lot if possible
- Same powder lot if possible
- Same bullet lot if possible
If you change any of these later, you back off and confirm again. That is not paranoia. That is standard practice.
Step 3 – Establish safe headspace and sizing
Before you chase accuracy, confirm your sizing setup is correct for your rifle. If your shoulder bump is inconsistent or excessive, you can create extraction and case life problems that look like pressure issues, and you can confuse yourself.
A good baseline for many bolt rifles is a small, consistent shoulder bump for reliable chambering, with brass that chambers smoothly. The exact number is rifle-dependent, but the principle is not. You want smooth chambering with consistent brass.
Anything that forces the bolt closed is a problem. It can mask real pressure signs and it can raise pressure if the case is not sitting right.
Step 4 – Start low, then climb with discipline
Start at the published minimum or a conservative starting load. Then increase in small increments. The actual increment size depends on the cartridge and case capacity, but the concept is consistent – your goal is to approach the usable ceiling slowly enough that you can see pressure building before it bites you.
During the climb, your job is not accuracy. Your job is safety and trend detection.
For each step, you do this sequence:
- Fire one round.
- Observe function. Bolt lift, extraction feel, ejector behavior.
- Inspect the brass. Case head marks, primer condition, any unusual expansion or damage.
- Record notes. Do not “remember it.” Write it down.
- Only then fire the next round.
If you are running three-shot groups during the climb, you are mixing two jobs at once. That is how people miss early warnings. Single-round inspection during the climb is a traditional method for a reason.
Step 5 – Identify your practical ceiling
Your practical ceiling is not “the max in the book.” Your practical ceiling is the first point where your rifle starts to show meaningful pressure signs or unacceptable behavior, even if it is still technically functional.
Once you hit a clear sign (sticky bolt lift, ejector mark, sudden primer change paired with other indicators, loose pockets), you stop. Then you back down. That back-down level is often where the rifle is happiest anyway.
Many good loads are not “max.” They are consistent, accurate, and predictable. That is what you want.
Step 6 – Only after safety, tune for accuracy
Once you have a safe pressure window, then you can tune seating depth and other variables for accuracy. Do not tune seating depth at the top end without caution. Seating changes can raise pressure, especially if you reduce jump or touch the lands.
The safe approach is to tune seating depth using a load that has margin. If your load is already at the ceiling, seating deeper or reducing jump can push you over. Accuracy is not worth overpressure.
Tools That Help You Catch Overpressure Early
You do not need a lab to reload safely, but you do need a few tools that support consistency and repeatable measurements.
Chronograph – useful, but not a pressure gauge
A chrono helps you see trends. Pressure often shows up as sudden velocity jumps, unexplained ES/SD changes, or inconsistent behavior at a given charge step. But velocity alone cannot certify “safe.” Use it as a signal to look closer, not as permission to push harder.
Micrometer – for case head measurement
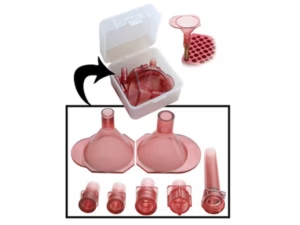
A quality 0.0001″ micrometer lets you track case head expansion objectively. This is one of the most reliable pressure indicators when used consistently. Measure at the same point just above the extractor groove every time.
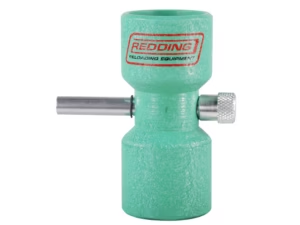
Comparators – consistency in sizing and seating
Base-to-ogive measurements help control seating consistency, which controls jump consistency, which helps control pressure consistency. Shoulder bump comparators help ensure your brass is sized consistently and chambers the same way every time.
A real logbook – because memory lies
Pressure problems often make sense after the fact, when you can see what changed. If you do not log, you are guessing.
At minimum, record:
- Date and location
- Cartridge and rifle
- Brass brand, lot, and number of firings
- Primer type
- Powder type and lot number
- Bullet type and seating depth method (base-to-ogive is best)
- Temperature and conditions
- Notes on bolt lift, extraction, and brass condition
- Velocity data if available
How to Treat Any Change – The “Restart Rule”
Reloaders get in trouble when they change something and pretend nothing changed.
Use this rule:
If you change any component that can influence pressure, you back off and confirm again.
That includes:
- Powder lot change
- Primer change
- Brass brand change (or a new lot that measures different)
- Bullet change (even same weight, different bearing surface and shape)
- Seating depth change that meaningfully alters jump or case volume
- Any change to crimp or neck tension method
This is not optional if you want to stay safe. This is how the careful guys do it.
Troubleshooting – When You See Pressure Earlier Than Expected
If pressure shows up “too soon,” do not assume the manual is wrong. Assume your system is different. Here is the troubleshooting order I trust.
1) Confirm you are not chasing the lands by accident
Measure your true distance to the lands using a proper method and confirm your loaded rounds have the jump you think they have. A surprising number of pressure events come from “I thought I had jump” turning into “I was actually jamming.”
2) Confirm your brass is not reducing capacity
If you switched to thicker brass with less internal volume, pressure can rise. If you are mixing brass, stop. Develop with one consistent type and keep it that way.
3) Look at neck tension and release
If bullets are held too hard or inconsistently, start pressure changes. Also confirm your expander setup, neck sizing method, and whether you are over-working the brass.
4) Evaluate temperature and testing pace
If you are shooting fast strings and the chamber is hot, you might be creating a pressure situation that will not exist on a cold first shot, or you might be creating one that will absolutely exist in a hunting scenario after a few shots. Decide what you are testing and control the variables.
5) Confirm your scale and process integrity
Check your scale with check weights. Confirm your powder measure is consistent. Confirm you are not double-charging or bridging. This is basic, but it is where real-world mistakes live.
Overbore Cartridges – Why They Are Less Forgiving
Now back to the original cartridge-design meaning of overbore. Cartridges with large powder capacity relative to bore size often run high gas volume, high heat, and high throat erosion. Think 6.5-300 Weatherby, 26 Nosler, 28 Nosler, 7mm RUM. They can be fantastic performers, but they demand discipline.
Why less forgiving?
- They tend to operate near higher performance levels, so your margin can be smaller.
- They generate more heat, so your testing pace matters more.
- They can show diminishing returns fast, meaning you give up a lot of barrel life and safety margin for small velocity gains.
- Temperature sensitivity is often more pronounced with the large powder charges involved.
If you are running an overbore-style cartridge, you should be even more conservative about pressure ceilings, especially for a field rifle. Consistency beats speed.
Field Protocol – Building a Load That Stays Safe Outside the Range
Range conditions are not field conditions. In the field, you can have a warm chamber, ammo carried close to your body, dust, and different shooting cadence. A “maxed out” load that barely behaves at the range can turn into sticky bolt lift in a real hunt.
For a hunting load, the smart approach is to pick a load that has:
- Clean extraction with margin
- No case head marks in realistic temperatures
- Consistent velocity and point of impact
- Accuracy that you can reproduce when you are tired, cold, or rushed
That usually means you do not live at the top. You live where the rifle runs smooth.

FAQ – Straight Answers
Can I diagnose overpressure by primer look alone?
No. Primer appearance is information, not proof. Some rifles flatten primers early. Some primers crater easily. Use primer signs as part of a full system check, especially paired with bolt lift, extraction feel, and case head marks.
Is higher velocity always higher pressure?
Usually there is correlation, but it is not a law. You can have pressure spikes without huge velocity changes, especially when start pressure is affected by seating depth, neck tension, or jamming. The rifle’s behavior and brass tell the story.
What is the best “pressure sign”?
The best practical sign is a sudden change in bolt lift and extraction during a controlled workup. Add ejector marks and you have a very strong warning. The best overall approach is not hunting for a single sign – it is following a protocol that catches trends early.
How do I avoid overpressure without giving up performance?
Pick consistent components, control seating depth, avoid accidental land contact, manage heat, and stop chasing the last bit of speed. Most rifles shoot their best loads below the edge anyway.
Bottom Line
overpressure is what happens when your system produces more pressure than your rifle wants. It can come from obvious mistakes, but more often it comes from stacked variables – brass volume, seating depth, throat geometry, temperature, powder lot, primer choice, and bullet release.
The cure is not bravado. The cure is a serious protocol – start low, climb with discipline, inspect after every step, log everything, manage heat, and treat component changes as real changes.
Safety note – This page is educational and does not provide load data. Always follow published manufacturer load data, start low, work up carefully, and stop at the first real pressure sign.