The 25 Creedmoor has quickly become a favorite among precision shooters and hunters who want flat trajectories and mild recoil. Whether you’re loading Hornady brass for the first time or establishing a consistent process for the season ahead, proper case preparation is what separates mediocre accuracy from tight groups. New brass straight from the box isn’t always ready to load, even from quality manufacturers.
This checklist walks you through every step of preparing your 25 Creedmoor brass from start to finish. Follow these steps in order, and you’ll build a foundation for consistent, accurate ammunition that performs the same way every time you pull the trigger. We’ll cover the essential tasks, common pitfalls, and what tools actually matter for this specific cartridge.
Step 1: Clean Your New 25 Creedmoor Brass
Even factory-new brass carries manufacturing oils, dust, and residue that can interfere with sizing dies and contaminate your reloading bench. Starting with clean cases gives you a clear view of any defects and protects your expensive dies from abrasive particles. An ultrasonic cleaner or wet tumbler both work well for this initial cleaning step.
If you’re using an ultrasonic cleaner, a 10-15 minute cycle with a brass-specific cleaning solution removes most contaminants without being too aggressive. Wet tumbling with stainless steel pins takes longer (45-90 minutes) but delivers sparkling clean brass inside and out. Whichever method you choose, make sure cases are completely dry before moving to the sizing step, as moisture can cause rust in your dies or create hydraulic denting during resizing.
Quick cleaning tips
- Remove cases promptly after cleaning to prevent water spots
- Use a food dehydrator or low-temperature oven (150-170°F) for fast drying
- Inspect primer pockets during cleaning – debris here affects seating depth later
- Don’t over-tumble brass, as excessive polishing can thin case walls slightly
Step 2: Full-Length Resize with Proper Dies
Full-length resizing ensures your 25 Creedmoor brass will chamber smoothly in your specific rifle while establishing consistent neck tension for bullets. New brass is often slightly oversized or out-of-round from the manufacturing and packaging process. A quality full-length sizing die brings every dimension back to SAAMI specifications.
Set up your die according to the manufacturer’s instructions, typically touching the shell holder at full ram extension, then backing off a quarter turn. Use a proper case lube – even new brass needs lubrication to prevent stuck cases and galling inside your die. Apply lube sparingly but consistently to the case body and shoulder area, avoiding the neck and shoulder junction where excess lube can cause hydraulic dents.
Die setup considerations
- Check your press ram alignment before starting a large batch
- Resize a test case and verify it chambers smoothly in your rifle
- Clean your sizing die every 50-100 cases to remove lube buildup
- Consider a bushing die if you want precise control over neck tension
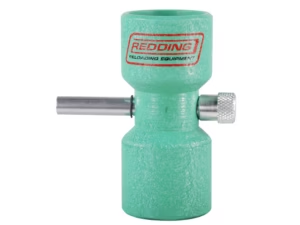
Step 3: Trim Cases to SAAMI Spec Length
The SAAMI maximum case length for 25 Creedmoor is 1.920 inches, with a trim-to length typically around 1.910 inches. New brass often varies slightly in length, and the resizing process can actually lengthen cases as brass flows during forming. Consistent case length ensures uniform bullet seating depth and prevents excessive pressure from crimped case mouths contacting the rifle’s throat.
Use a case trimmer that’s either caliber-specific or adjustable to the exact length you need. Trim all cases to the same length rather than only trimming long ones – this consistency pays off in accuracy. After trimming, remove the burr from inside the case mouth with a light pass of your deburring tool before moving to the next step.
| Measurement | Specification |
|---|---|
| Max case length | 1.920 inches |
| Trim-to length | 1.910 inches |
| Min case length | 1.900 inches |
Step 4: Deburr and Chamfer the Case Mouth
Trimming leaves sharp edges both inside and outside the case mouth that can shave bullet jackets during seating or create inconsistent bullet grip. Deburring removes the internal burr, while chamfering creates a smooth bevel on the outside edge. Both operations take only seconds per case but make a measurable difference in bullet seating consistency.
Hold your deburring tool at a slight angle and rotate 2-3 times inside the case mouth until you feel a smooth edge. For the outside chamfer, apply light pressure and rotate just enough to create a small, uniform bevel. Over-chamfering weakens the case mouth and reduces bullet grip, so aim for a subtle 15-20 degree angle rather than a deep cut.
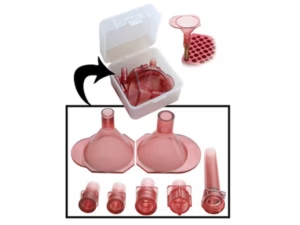
Step 5: Uniform and Clean Primer Pockets
Primer pockets on new brass can have burrs, manufacturing residue, or slight depth variations that affect primer seating consistency. A primer pocket uniformer cuts all pockets to the same depth, while a primer pocket cleaner removes debris. Consistent primer seating depth contributes to more uniform ignition and lower extreme spread in velocities.
Use the uniformer first if you’re going for maximum consistency, making 2-3 light passes until you feel it bottom out in the pocket. Follow with the pocket cleaner, spinning it in the pocket until no more residue appears on the tool. Some reloaders skip the uniforming step on new brass and only clean, which is acceptable for hunting ammunition where 0.5 MOA accuracy is sufficient.
Primer pocket prep checklist
- Check for military crimps if using surplus brass (rare with 25 Creedmoor)
- Remove uniformer cutting debris before cleaning
- Verify primer pocket depth is consistent across your batch
- Flash holes should be clear and centered – remove any burrs
Step 6: Final Inspection Before Loading
Before declaring your brass ready for powder and bullets, run through a final quality control check. This is your last chance to catch defects, measurement errors, or cases that slipped through earlier steps with problems. Good lighting and a systematic approach help you spot issues that could cause problems at the range or in the field.
Inspect each case for splits, dents, or deformities in the neck and shoulder area. Use a case gauge or your rifle’s chamber to verify every piece chambers smoothly. Check that all primer pockets are clean and uniform, and run your finger inside each case mouth to confirm smooth edges. Cases that don’t pass this inspection go into a separate container for practice loads or get recycled.
Final inspection points
- Case length consistency (all within 0.005 inches)
- No visible cracks or splits anywhere on the case
- Smooth case mouth inside and out
- Clean, uniform primer pockets
- Cases chamber and extract easily in your rifle
Common Mistakes in 25 Creedmoor Case Prep
One of the most frequent errors is over-trimming cases, especially when setting up a new trimmer for the first time. Always trim conservatively and check your first few cases with calipers. Cases trimmed too short can’t be fixed and may cause inconsistent headspace or reduced case life.
Insufficient lubrication during sizing causes stuck cases and damaged dies – a problem that ruins your day and potentially your equipment. Apply lube to every case, even when you’re in a hurry. On the flip side, too much lube creates hydraulic dents in the shoulder that weaken cases.
Many reloaders skip the primer pocket work entirely, thinking it doesn’t matter for hunting rifles. While you can get away with this sometimes, inconsistent primer seating affects ignition timing and shows up as velocity variation on a chronograph. Taking the extra few minutes per case pays dividends in consistency.
Not checking chambering after case prep is another common oversight. A case that doesn’t chamber smoothly after all your prep work indicates a problem with your die setup or process. Catching this before you load 50 rounds saves components and frustration.
Quick mistakes to avoid
- Mixing brass from different manufacturers in precision loads
- Skipping the cleaning step and contaminating dies
- Over-chamfering case mouths and reducing neck tension
- Not drying brass completely before sizing
- Forcing cases that don’t chamber easily
- Using damaged or worn case prep tools
FAQ: 25 Creedmoor Brass Preparation
Do I need to prep new Hornady 25 Creedmoor brass the same way as once-fired brass?
Yes, new brass still needs cleaning, sizing, and length verification. While it’s generally cleaner than once-fired brass, manufacturing variations mean you should still run through the full prep checklist. The only step you might skip is aggressive primer pocket uniforming if the brass is from a quality manufacturer.
How often should I trim 25 Creedmoor cases?
Check case length after every firing. Most shooters find they need to trim every 2-3 firings with moderate loads. If you’re running hot loads near maximum pressure, cases may grow faster and need trimming after each firing.
Can I use a universal case prep center for 25 Creedmoor?
Absolutely. Multi-function case prep centers work well for 25 Creedmoor as long as you have the correct pilots and shell holders. These tools speed up the deburring, chamfering, and pocket cleaning steps significantly when processing large batches.
What’s the minimum case prep I can do for hunting ammunition?
At minimum, clean your brass, full-length resize with proper lubrication, trim to consistent length, and deburr the case mouth. You can skip primer pocket uniforming for hunting loads if you’re achieving acceptable accuracy. Never skip the sizing, trimming, or basic deburring steps.
Should I anneal new 25 Creedmoor brass before the first loading?
New brass doesn’t require annealing before initial loading. The brass is already in a consistent, work-hardened state from manufacturing. Consider annealing after 3-4 firings to extend case life and maintain consistent neck tension.
How do I know if my case prep is actually improving accuracy?
Shoot groups with prepped brass versus minimally prepped brass and compare. More importantly, watch your chronograph numbers – properly prepped brass typically shows lower extreme spread and standard deviation in velocity, which translates to better accuracy at distance.
Quick takeaways
- Clean new brass before sizing to protect your dies and spot defects
- Full-length resize every case with proper lubrication for consistent chambering
- Trim all cases to the same length, not just the long ones
- Deburr and chamfer case mouths for smooth bullet seating
- Clean primer pockets for consistent ignition
- Always verify cases chamber smoothly before loading
- Quality case prep takes time but delivers measurable accuracy improvements
Proper case preparation for your 25 Creedmoor ammunition isn’t glamorous work, but it’s the foundation of consistent accuracy. Each step in this checklist addresses a specific variable that affects how your ammunition performs. Skip steps, and you’re introducing inconsistency that shows up on target, especially at longer ranges where the 25 Creedmoor really shines.
Start with this systematic approach for your first batch of brass, and you’ll quickly develop a rhythm that makes the process faster without sacrificing quality. Keep your tools clean and sharp, work in a well-lit area, and don’t rush through the steps. The time you invest in case prep pays back every time you shoot a tight group or make a clean, ethical harvest in the field. Your brass is ready – now go make some accurate ammunition.